

CITG Unreal Driving Simulator
Resource usage instructions for the DrivingSim_UE52 application
DrivingSim_UE52 is a research tool that is designed to simulate driving a car in traffic on a linear road. It provides a basic Unreal Engine template that can be further expanded on, based on the researcher’s specific research question. The simulated traffic has been set up parametrically so it can easily be changed for different testing scenarios. In this guide we will walk you through the usage of this Unreal Engine project and how it can be adapted to your research. During the course you will be able to get further assistance in setting up specifics for the project.
1. Virtual Environment

Content: We have created a virtual environment that is loosely based on the Noordzeeweg in Rozenburg. It is a 5km straight two-lane road that can be further modified.
Function: You will be able to add your own objects to this environment to develop a test scenario that is suitable for your research question.
How to use: When opening the Unreal project, this is the default map that will be loaded. (LVL_Basic)
2. Object Blueprints
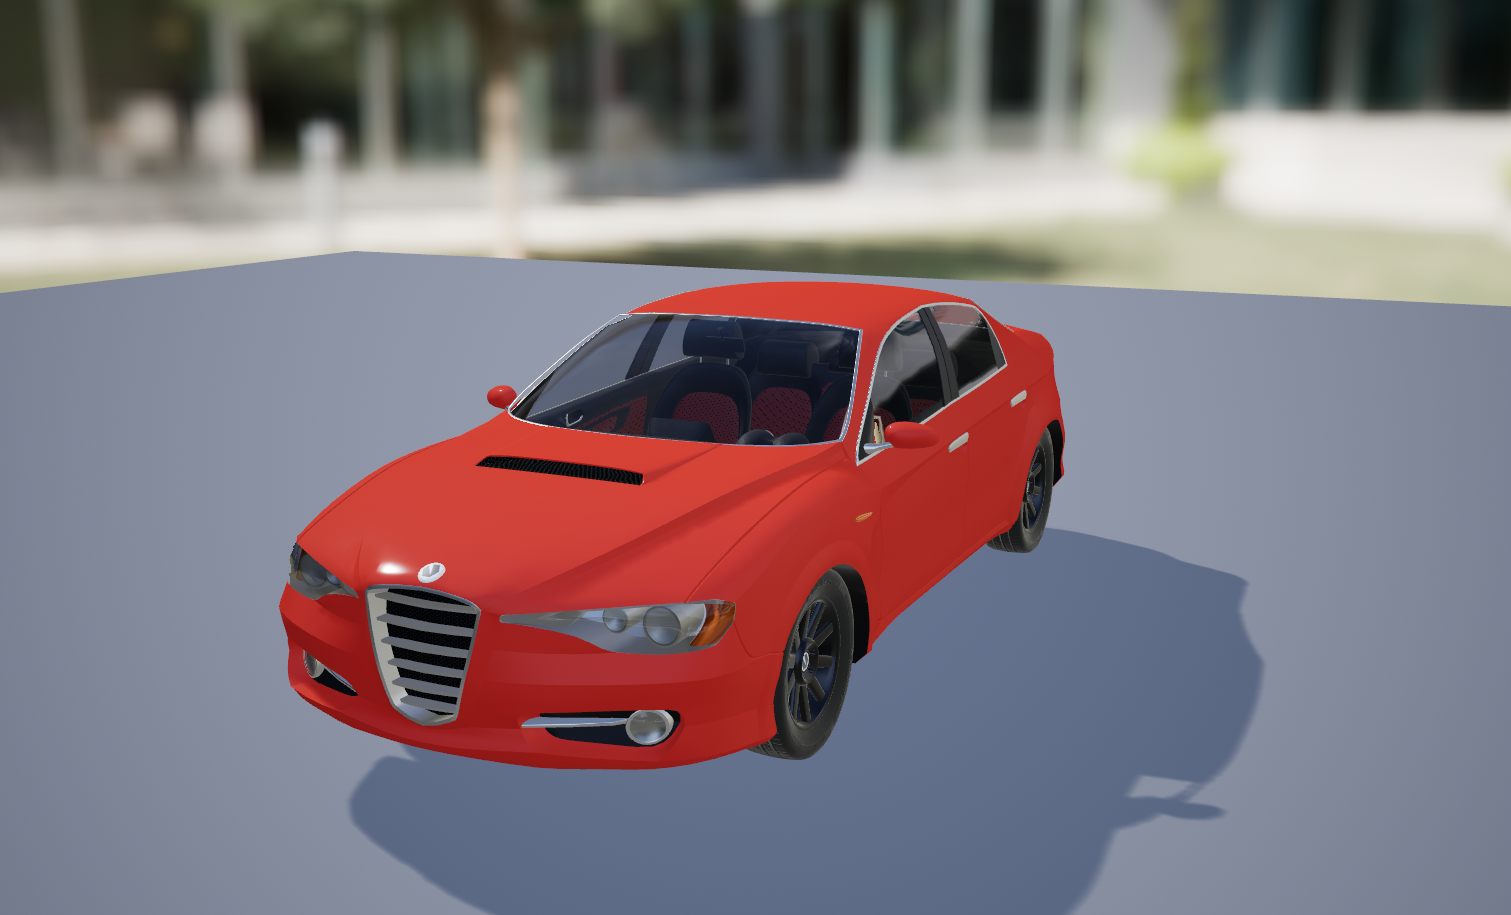
Content: Ego Car (BP_PlayerCar)
Function: This is the vehicle that is driven by the test participant. It contains all the specific Player scripts that control the properties of the car.
Location: Content Browser: Content > DrivingSimUE5 > Blueprints > Player
How to use: The car is automatically spawned when starting the simulation. You can edit the scripts inside the Blueprint, but this is a complex task and should be done with assistance of a XR-Zone teacher.
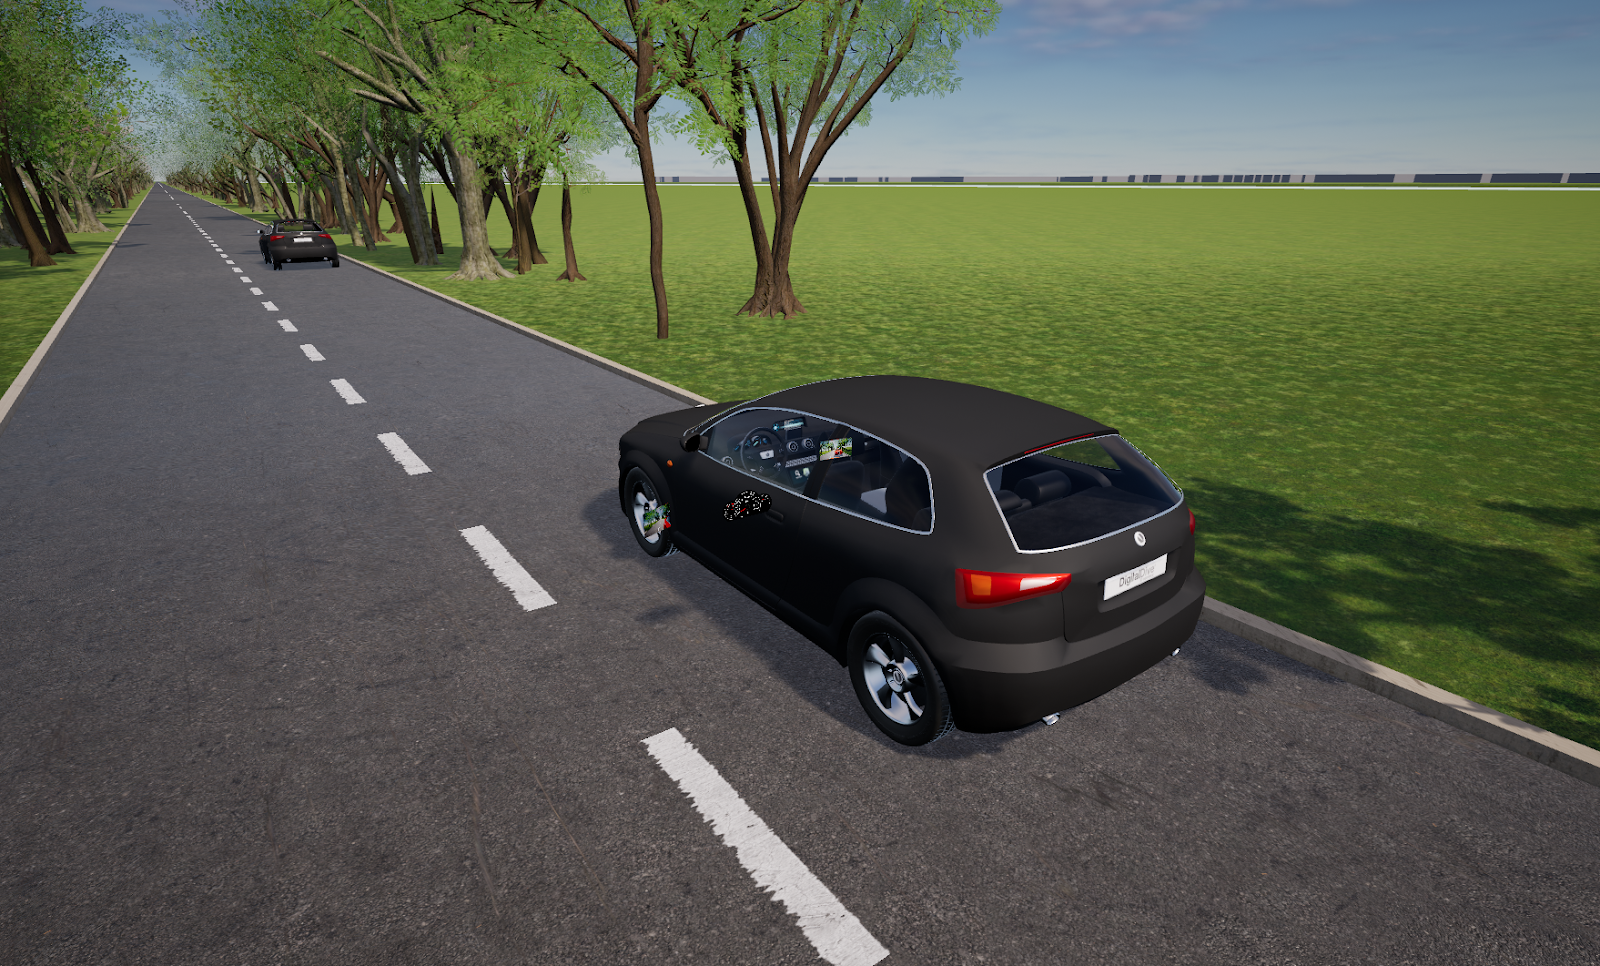
Content: AI Cars (BP_BaseCar)
Function: This is the base Blueprint of the car, that all the other cars in traffic are based on. (Also the Ego Car is based on this Blueprint, but is player controllable.)
Location: Content Browser: Content > DD_Vehicles_Basic > Blueprints > Vehicles
How to use: The other cars that make up the traffic simulation are automatically spawned when running the simulation, based on the parameters in the Traffic UI. You can edit the scripts inside this Blueprint, but this is a complex task and should be done with assistance of a XR-Zone teacher.
3. User Interface
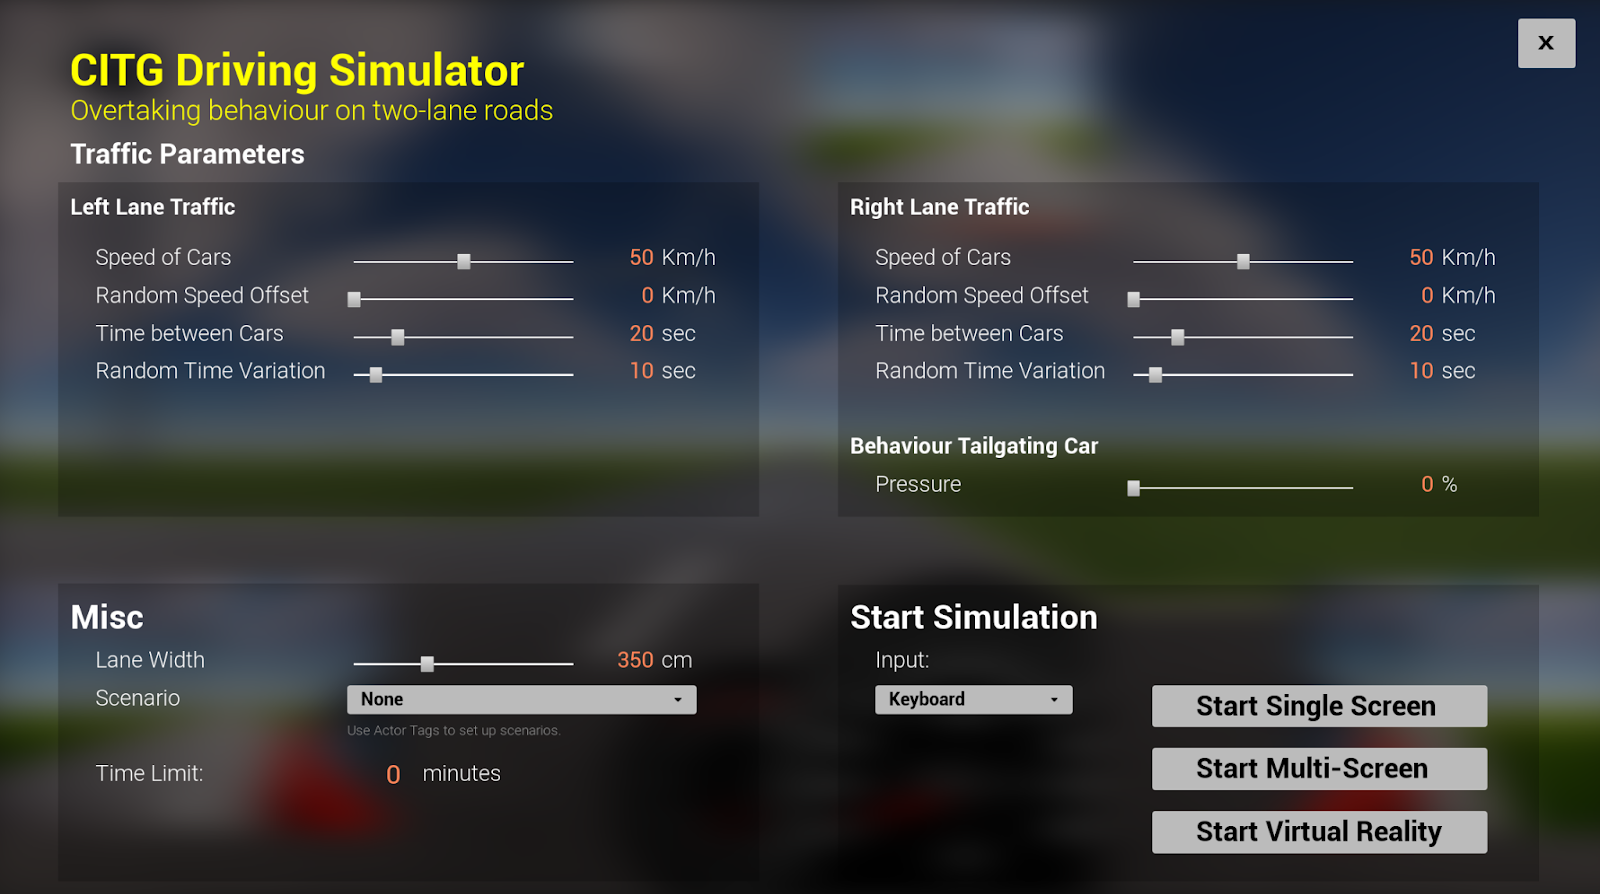
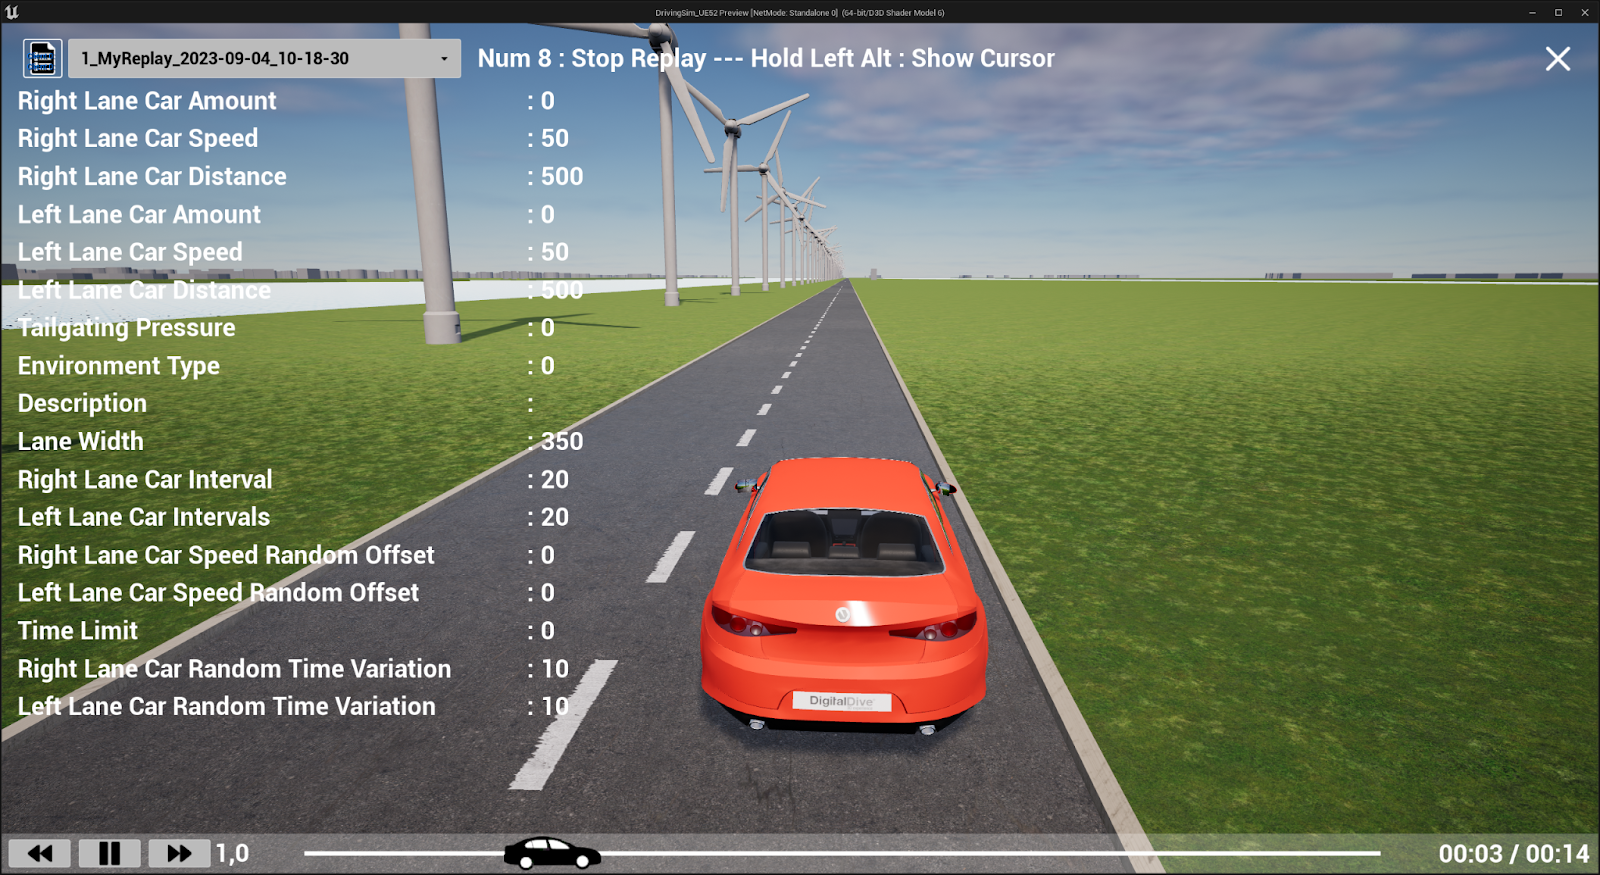
Contents: Traffic UI Parameter Menu (WBP_Menu)
Function: Contains the default parameters set up for this template. You can open and close this menu by pressing the F key on the keyboard when the simulation is running. It allows you to control the traffic scenario. You can also manually typ in the desired values by clicking on the orange number.
How to use:
Options for traffic are to be set for both left lane and right lane.
- Speed of Cars: Sets the default speed of traffic in Km/h
- Random Speed Offset: Adds a random deviation to the previously set speed.
- Time Between Cars: Time in seconds between the cars appearing on the road
- Lane Width: Width of the lane in cm.
- Scenario: Allows the researcher to select a scenario for testing. In the Unreal Editor environment objects can be tagged with an Actor Tag by filling in A, B or C, and this allows the showing or hiding of these objects during the simulation.
- Input: Select control input (Keyboard/Steering Wheel/Controller)
- Start Single Screen: For testing on a regular computer/laptop.
- Start Multi-Screen: For testing on the actual driving simulator in CITG.
- Start Virtual Reality: For testing with a VR headset.
4. Running a test simulation
To start the simulation for running a test:
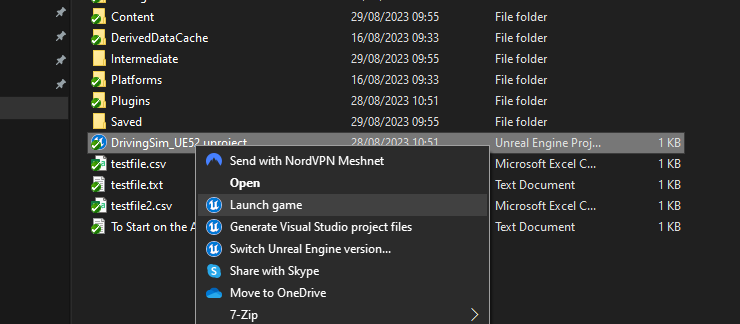
To properly start the simulation on the actual driving simulator in CITG or in VR, you have to fully close the Unreal Editor first. If you want to also use VR, make sure SteamVR is running. Then go into the project folder and right-click the DrivingSim_UE52.uproject file and select Launch Game. This will start the game in fullscreen on the multi-monitor setup and allow for VR control. By pressing the top left green button on the steering wheel you can reset the VR view.
To make a recording:
While running the simulation you can press Numpad 7 to start a recording. When the recording is running you will see an indicator on the screen. To stop recording press Numpad 8. To play an existing recording press Numpad 9 (must not be in VR mode) and you will enter Replay mode.
In Replay mode you can show the mouse cursor by holding down the Alt key. You can select a previous recording from the menu in the top left. Alongside the recorded Unreal Replay file there is also a .CSV file in the project folder with the recorded data. It is a good idea to make a backup of any recordings that you wish to keep (Project Folder > Saved > Demos).
5. Frequently Asked Questions
- The Unreal I’ve downloaded can’t run the the project file
Possible reasons:
You might have the wrong version of Unreal.
Solution:
You need to install Unreal Engine 5.2. Download this version via the Epic Launcher.
- VR isn’t working properly
Possible reasons:
SteamVR might not be running.
Solution:
Start SteamVR from the desktop before running the application.
Problem solving channel
- Contact course teachers
- Contact teaching assistants
- Contact XR-Zone
- Read the Epic’s Unreal Forum